Tuesday 11 September 2012

Annoying Popups and General Crap on your computer.

Annoying Popups and General Crap on your computer.
Do you ever get popups and general crap on your computer, i have just the program for you, its FREE yes FREE !!!!! and it works, just as long as you remember to keep it up to date, its called malwarebytes and can be found at http://www.malwarebytes.org.
Malwarebytes
If the site does not look as the image above then you will more than likely have some fake antivirus software already installed ( you may need to get the download files on another computer) if it does look like this one above then click on the "Free Download" button, you will be taken to another site which keeps the installer file, normally the CNET Downloads site, and download the setup file.
Once it has finished downloading then you just need to run the file and install it onto your computer
double click on the setup file and select English as your language and click on OK.
 Malwarebytes
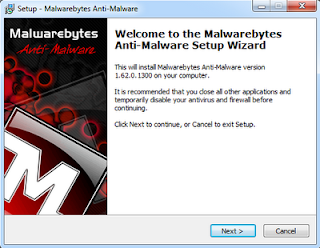
You will now be told what version you are installing, the version i have in the images is 1.62.0.1300, Click on the Next button.
Malwarebytes
Make sure that you check the two boxes to accept the license agreement and also accept that you will only use this program for non-commercial use.
Malwarebytes
Then hit the next button
Malwarebytes
Hit the next button again
Malwarebytes
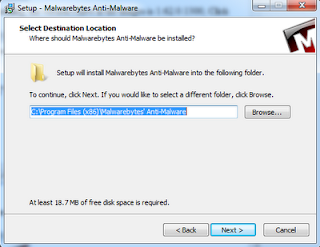
Keep the Default install location and then hit next again
Malwarebytes
Hit the next button again
Malwarebytes
Leave the default settings again although you could choose to create a Quick Launch Icon (this is the little icon next to the Start button)
Malwarebytes
Click on the Install Button
Malwarebytes
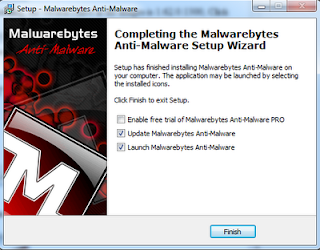
To enable it stays free please make sure that you un tick the Enable Free Trial box and leave the other two ticked and click on finish.
Malwarebytes
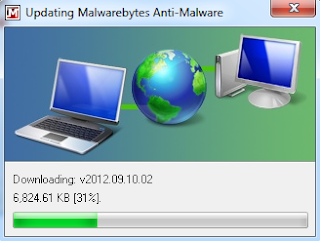
Let it update and then once it has finished the program will open up itself.
Malwarebytes
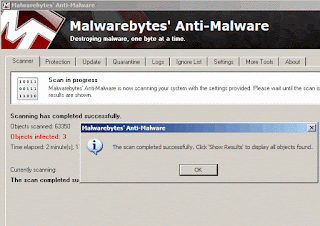
Once it has open simply choose a Quick Scan and then press the Scan button and wait for it to finish
Malwarebytes
If you have any crap in there it will come up and tell you like the image above to remove them tick the box next to each one and then hit the Remove Selected Button and you will be Malware free.
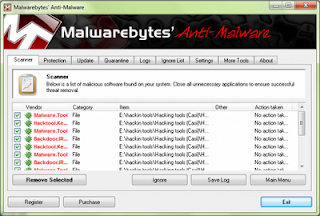
Malwarebytes
If you still feel like you have crap on there then repeat the process again and Remove and Reboot.

Monday 10 September 2012

Cisco IOS - Tips

If you have a Cisco 857 router and a vpn setup, you may notice that you can connect to the vpn but may not be able to connect to servers and other resources internally, i had a problem where i wanted to be able to connect to my server from both externally and internally when on my vpn.

To achieve this you need to setup Bypass NAT and attach it to your ACL

I did this by doing the following.

I first setup my ACL so that i had access to the local network when on the VPN

access-list 100 deny ip 192.168.2.0 0.0.0.255 192.168.5.0 0.0.0.255
access-list 100 permit ip 192.168.2.0 0.0.0.255 any
access-list 110 permit ip 192.168.2.0 0.0.0.255 192.168.5.0 0.0.0.255
Make sure to add the deny statement first.

I also added a 3rd access-list number 120 for matching ip address's for the route-map i was about to create 
access-list 120 permit ip 192.168.2.0 0.0.0.255 192.168.5.0 0.0.0.255

Once i had this in place i setup a Route-map and named it Bypass-NAT
route-map Bypass-NAT deny 10
match ip address 120
!
route-map Bypass-NAT permit 20

Once i saved all the above settings i then added two more extendable entries into my firewall as per below

ip nat inside source static tcp 192.168.2.120 5800 122.***.***.*** 5800 route-map Bypass-NAT extendable
ip nat inside source static tcp 192.168.2.120 5900 122.***.***.*** 5900 route-map Bypass-NAT extendable

I added in my route-map for this to be accepted you have to put in your external IP, once you have put in the rules connect to your VPN and try to connect to the server check to see if this works, then also disconnect and try connecting back to the server but this time using your external IP address. the above rule is for me to connect to my laptop using VNC which works on the private IP when on the VPN and also the Public IP when im not on the VPN.

I have also used these settings on my work Cisco 881 Router.

MYOB Printer #5 Error

MYOB Premier V19 Printer Error #5
I was using MYOB Premier V19 the other day and when i went to print something and this error came up.
Myob Printer 5 Error
It was an easy fix all i had to do was to check that the default printer was set to a real printer and not a PDF printer or a network printer with a UNC path, once you have set the default printer close down MYOB and open it again, it should work this time.

Outlook Disconnected from Exchange Server

Outlook Disconnected from Exchange Server
The main issue that i have come accross when outlook is disconnected is that the exchange database is not mounted, this usually occurs when the server has been rebooted and it hasnt succefully re mounted the database to check this firstly RDP into the exchange server, login with the admin username and password.
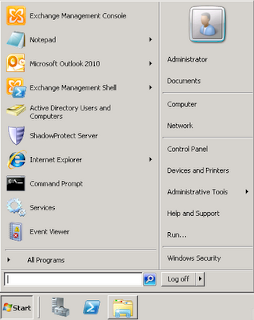
Click on start and then select Exchange Manangement Console

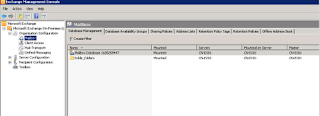
Once it has opened you will need to click on Microsoft Exchange On-Premises > Organisation Configuration > Mailbox

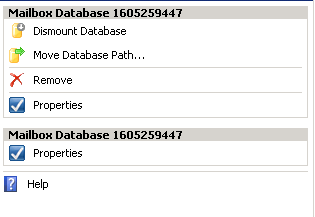
On the first tab you will see Database Management and the databases listed as the picture above, if the Mailbox Database is not mounted it will say either (Unknown or Dismounted) in the Mounted column, to mount the database you need to select the Mount Database option from the menu on the right hand side (this appears where Dismount Database is in the image below) then choose the database and select ok.

You should then ask the Users to close and reopen outlook for them to get onto their emails.

Granular restore using CMDlets in sharepoint 2010

Granular restore using CMDlets in sharepoint 2010
This one is a very simple task, if you have ever come into work one day and your sharepoint server has decided to crap itself (Its a Microsoft Product they usually do at some point), you may need to do a command line restore of your backups
Login to your Sharepoint server via RDP or if you can get to the terminal itself then jump on the keyboard and open up the Sharepoint 2010 Management Shell.

Type the following text into the CLI (restore-spsite -identity http://site to restore to -path \\the backup file you want to restore.bak)

Then Press the Enter Key
You will be asked to Overwrite the existing site that is currently there Choose Y and hit enter

More than likely it will come back with an error stating that the site already exists and cant be overwritten like the image below

What we need to do is force the overwrite to do this simeply add -F to the end of the script like below
restore-spsite -identity http://site to restore to -path \\the backup file you want to restore.bak -F and press Enter

It will then ask you to Overwrite again so press Y and Enter again and the restore will start

It will take a while if you sharepoint sites are pretty large like mine are, just leave the window open in the background and when it has finished it will tell you as per the image below.

Sharepoint "Additions to this Web site have been blocked."

I was at work the other day when i recieved a call from one of my colleagues, they informed me that they could no longer make changes to a sharepoint site, all staff had access to edit and post new items.
I loaded up the site and the first thing i loaded up was the permissions options for the site, straigh away i noticed there was something wrong as my login was the sharepoint farm admin and all i could see was the image below
Sharepoint 2010
I initailly thought that someone had changed ther permissions for everyone, i went to the public document library to try and upload a file and i saw the image below.
Sharepoint 2010
I did a quick google search but that came up with millions of pages none of them linking me to what i was looking for, i soon relaised what it was, i noticed on the server that for some reason my backups for the sites were still running, they should have finished over night which led me to believe that they had stopped working for some reason, as soon as i saw this i knew what the problem was, the site had become locked for editing.

I connected to the Sharepoint server via RDP and opened up Central Administration, from there i went into Application Management then to Site Collection Quotas and Locks, i selected the Site Collection at the top and changed the option from Read-Only to Not Locked and clicked on OK and the site was working as normal again.
Sharepoint 2010
This problem usually appears when the backups are either running or have failed and let the Read-Only flag on the site.

MAPI was unable to load the information service gsync.dll issues with outlook and Google Apps Sync

MAPI was unable to load the information service gsync.dll issues with outlook and Google Apps Sync
Google Apps Is an awesome free service (up to 10 Email address's) for business email, there are tons of features that you can normally only get with an Enterprise level System like Microsoft Exchange, except its all hosted in the cloud and can be accessed from anywhere with an internet connection.

I have myself moved over to Google Apps and found it to be a very good service, i am used to using the Gmail interface as i have had a Gmail account since it was first introduced back in 2004 when a friend invited me to check it out, but most people are familiar with the Microsoft Outlook setup and this can still be used with Google Apps although there are a few steps you need to follow in order for your newly created mailbox to load up next time you reboot your computer or close and reopen Outlook.

This works for both Outlook 2007 and 2010, on windows platforms i have not tested with Office for MAC.

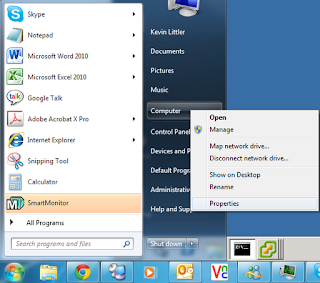
1) Click on Start and right-click "Computer" and choose properties

2) Click the "Advanced system settings" tab


3) Click Advanced Tab
4) Click "Environment Variables"

5) In the lower box, double-click "Path"

6) remove the \ at the end of the google app sync directory (you may also see google apps migration instead)
7) Click "OK" until all of the dialogs are closed
8) Open Outlook