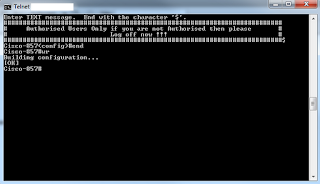
These banners have been put onto a Cisco 857 Rotuer but the code should work on most cisco routers that have the CLI.
Message of the Day (MOTD) - Shown before the login prompt. For temporary messages that may change from time to time, such as “Router1 down for maintenance at midnight.”
Login - Shown before the login prompt but after the MOTD banner. For
permanent messages such as “Unauthorized Access Prohibited.”
Exec - Shown after the login prompt. Used to supply information that
should be hidden from unauthorized users.
I have all three banners on my rotuer the MOTD banner, Exec banner and Login Banner, i did this just for an example of how to create them and also because they look great.
They are really easy to do, follow the steps below to enable the banner you want to put onto your router.
Exec Banner
Login to your router via console cable or via telnet
Type enable and then enter
Then you need to go into config mode by typing "conf t" and enter.

Type banner exec $ (the $ can be replaced by any symbol but you must not use it in your banner as it is used for symbolysing the end of your banner).
I save my text that i want to input in a notepad file first, so that i can manipulate it easier then i copy and paste it in line by line.

When you have finished make sure that you put in the $ symbol or the same symbol that you used in the start of the code and press the enter key followed by "end" to exit config mode then "wr" to write the config back to the router.

MOTD Banner
Login to your router via console cable or via telnet
Type enable and then enter
Then you need to go into config mode by typing "conf t" and enter.

Type banner motd $ and the press enter (the $ can be replaced by any symbol but you must not use it in your banner as it is used for symbolysing the end of your banner).

I save my text that i want to input in a notepad file first, so that i can manipulate it easier then i copy and paste it in line by line.

When you have finished make sure that you put in the $ symbol or the same symbol that you used in the start of the code and press the enter key followed by "end" to exit config mode then "wr" to write the config back to the router.

Login Banner
Login to your router via console cable or via telnet
Type enable and then enter
Then you need to go into config mode by typing "conf t" and enter.

Type banner login $ and the press enter (the $ can be replaced by any symbol but you must not use it in your banner as it is used for symbolysing the end of your banner).

I save my text that i want to input in a notepad file first so that i can manipulate it easier, then i copy and paste it in line by line.

When you have finished make sure that you put in the $ symbol or the same symbol that you used in the start of the code and press the enter key followed by "end" to exit config mode then "wr" to write the config back to the router.
